
11 Waterproofing Detailing Mistakes at Penetrations, Joints and Terminations
Membranes rarely fail in the middle of a flat field. They fail at the edges, corners, pipes, drains, doors and joints, where the geometry changes and two materials meet. Whether the system is a sheet, a coating or spray polyurea, the details decide the outcome. Here are the eleven detailing mistakes that cause the most leaks on roofs, decks, foundations and ponds, with what to do instead.

Key takeaways
- Detail first, field second: every penetration, corner and termination should be stripe-coated or flashed before the main membrane goes on.
- Moving joints need joint systems, not just more coating.
- Terminations need mechanical protection, such as a termination bar, reglet or counterflashing, not caulk alone.
- Most fluid-applied failures trace back to thin spots, contamination between coats or application near the dew point.
Why details fail first
In the field of a membrane, the material only has to sit still and resist water. At a detail, it has to turn corners, change planes, bond to a different substrate, accommodate differential movement and often resist concentrated water flow. Liquid membranes also tend to run thin at outside corners and pool thick in inside corners. Add the fact that details are labor-intensive and often rushed at the end of a day, and you have the recipe for most leaks.
The eleven mistakes
1. Coating straight over moving joints
Expansion joints and building separation joints can move far more than any membrane can stretch. A coating applied continuously across them will tear on the first big temperature swing. Use a dedicated joint system or a sealant joint with backer rod and bond-breaker sized for the movement, and terminate or loop the membrane at each side per the manufacturer's detail.
2. Skipping the stripe coat
A stripe coat (or detail coat) is an extra layer of membrane, often with reinforcing fabric, applied to cracks, corners, edges and penetrations before the field coat. It makes up for the thinning that happens on sharp geometry and gives extra crack-bridging capacity where stress concentrates. Leaving it out is one of the most common reasons coatings split at wall-to-floor joints.
3. Sharp inside corners with no fillet
A liquid membrane or sheet bridging a sharp 90-degree inside corner is under constant stress and often contains a void behind it. Form a cove or fillet with sealant or polymer-modified mortar before membrane work, or use a cant strip on roofs, so the membrane transitions on a curve.
4. Clustered pipes and permanent pitch pans
Pipes and conduits installed a few inches apart cannot be flashed individually, so crews resort to pitch pans (pitch pockets) filled with sealant. Those fillers shrink and pull away and need regular maintenance. Space penetrations far enough apart for prefabricated boots or collars, group conduits through a curbed enclosure, and treat pitch pans as a maintenance item rather than a permanent solution.
5. Below-grade penetrations without seals
Pipes through foundation walls see continuous hydrostatic pressure. Use sleeves with mechanical link seals, hydrophilic swelling seals, or the membrane manufacturer's collar detail, and extend the membrane onto the pipe with a clamped or reinforced termination. Grouting around a pipe and coating over it rarely survives settlement and thermal movement.
6. Feather-edged or caulk-only terminations
Where a membrane stops, water will try to get behind it. A coating that simply thins out on a wall, or a sheet held only by caulk, will eventually peel. Terminate with a termination bar fastened at close spacing and sealed, set the edge into a reglet, or cover it with counterflashing. If terms like reglet, cant and counterflashing are new to you, the glossary at Coatingpedia is a handy reference.
7. Flashing too low and doors with no upturn
Base flashings on roofs are commonly carried at least 8 inches above the finished roof surface, a widely used industry minimum, so splashing water and snow cannot overtop them. On decks and balconies, the membrane needs to turn up under the door threshold onto a sill pan. A door set flush with the deck surface is a leak waiting for the first wind-driven rain.
8. Cold joints without waterstops
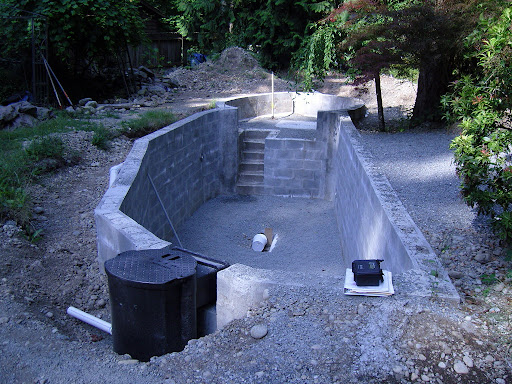
Every concrete pour boundary, including wall-to-footing joints and joints between wall lifts, is a weak plane for water. In below-grade and water-retaining structures, install waterstops when the concrete is placed: PVC or rubber waterstops cast across the joint, hydrophilic strips that swell on contact with water, or crystalline joint treatments. Then stripe-coat the joint on the positive side. Our guide to positive and negative side waterproofing explains why these joints carry so much pressure.
9. Drains that do not capture the membrane
Drains should sit at the low point of the membrane, not above it, and the membrane must be carried into the drain bowl and secured with the clamping ring. On plazas and decks with overburden, drains need weep openings at the membrane level as well as the surface. A drain that is set high or merely caulked to the membrane guarantees ponding around it and a leak path beneath it. More on drain levels appears in our deck and plaza buyer's guide.
10. Incompatible materials at transitions
Some materials attack or refuse to bond to others. PVC and EPDM are not compatible with asphalt; silicone coatings shed almost everything except silicone; some sealants inhibit polyurea or urethane cure. Wherever the waterproofing meets another system, such as a wall air barrier, a window sill, a roof membrane or an old coating, confirm compatibility in writing with both manufacturers and use the transition material they approve.
11. Skipping field quality control
Fluid-applied systems fail from contamination between coats, missed recoat windows, application on damp substrates, and thin spots. Practical controls include:
- Checking that substrate temperature is at least 5°F above the dew point before and during application, a standard coatings rule.
- Recording ambient temperature, humidity and substrate moisture each day.
- Recoating within the manufacturer's window or abrading and priming when it has passed.
- Taking wet film readings as you go and reconciling gallons used against area covered. Our material quantity calculator shows how many gallons a given area and thickness should take.
Quick reference table
| Detail | Typical failure | Better practice |
|---|---|---|
| Expansion joint | Coating tears across joint | Joint system or sized sealant joint; terminate membrane each side |
| Inside corner | Bridging, voids, splitting | Fillet or cant, then reinforced stripe coat |
| Pipe penetration (roof) | Sealant shrinks, water tracks down pipe | Prefab boot or collar, clamp, spaced pipes |
| Pipe penetration (below grade) | Leak around pipe under pressure | Sleeve with link seal or hydrophilic seal, membrane collar |
| Top termination | Peeling edge, water behind membrane | Termination bar, reglet or counterflashing |
| Door threshold | Water under sill into wall | Sill pan and membrane upturn under threshold |
| Cold joint | Seepage along joint | Waterstop at pour plus stripe coat |
| Drain | Ponding ring, leak under drain | Set at low point, membrane clamped in bowl |
| Material transition | Delamination or chemical attack | Written compatibility, approved transition product |
Pre-application detail walk
Before any field membrane goes down, walk the job with the applicator and the owner's representative and confirm:
- All penetrations are installed, spaced for flashing and have the correct boots, collars or sleeves.
- Inside corners have fillets or cants; outside corners are eased.
- Cracks are mapped and categorized as static or moving, with the treatment for each.
- Expansion joints have their joint system on site and a tie-in detail drawn.
- Drains are set at the low points with clamping rings available.
- Termination heights meet the specification, and the termination method is agreed.
- Door sills have pans and enough height for the membrane upturn.
- Compatibility letters are in hand for every material transition.
- Moisture testing results meet the manufacturer's limits; see concrete moisture testing.
Photograph every detail after stripe coating and before the field coat. Those photos are invaluable for warranty claims and future leak investigations, because the details are hidden once the job is complete.
Testing the details
On horizontal waterproofing over occupied space, flood testing or electronic leak detection is the best way to prove the details before they are buried. The IIBEC overview of leak detection methods explains how flood testing and low- and high-voltage electronic methods compare. High-voltage testing in particular can check vertical upturns and penetrations that a flood test may not reach.
Frequently asked questions
What is a stripe coat in waterproofing?
A stripe or detail coat is an extra layer of membrane, often reinforced with fabric, applied at cracks, corners, edges and penetrations before the main coat to add thickness and crack-bridging where stress is highest.
How high should roof flashing go?
A common industry minimum is 8 inches above the finished roof surface, but the manufacturer's details and the project specification control.
Are pitch pans a permanent fix?
No. Their sealant fill shrinks and separates over time, so they need regular inspection and topping off. Prefabricated boots or curbed enclosures are more durable.
What is a waterstop?
A waterstop is a strip of PVC, rubber or hydrophilic material cast into a concrete joint to block water from traveling through it. It must be installed when the concrete is placed.
Talk to an applicator
ArmorThane makes spray-applied polyurea waterproofing systems and supports trained applicators. Request a quote or find an applicator near you.
0 Comments